
I needed some images created to go with my blog articles.
Here’s an example of what I created using Canva – a free graphic design tool website:
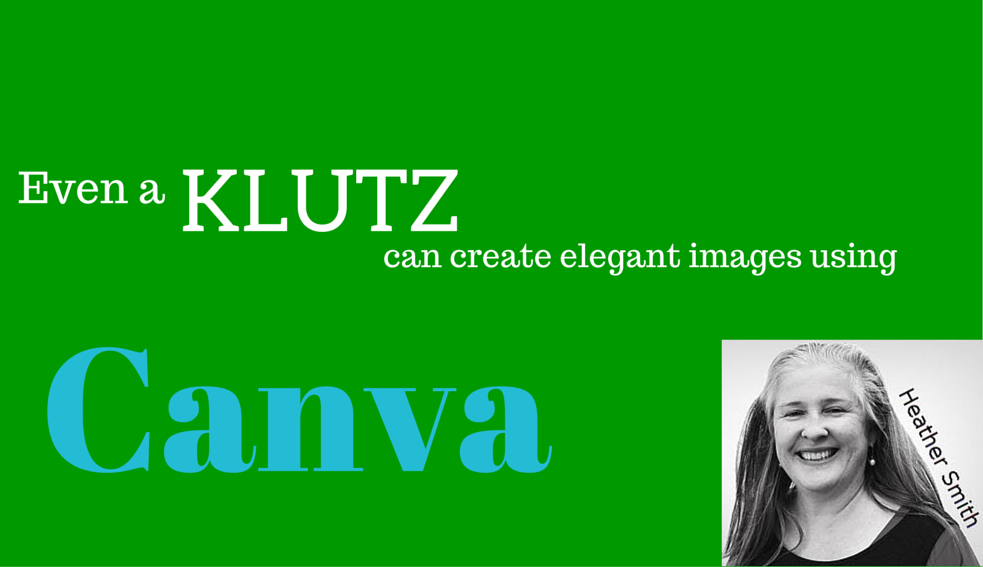
I like this style of image because:
- I own the copyright on it – so have no heart pumping concerns about using it.
- It’s crisp and clear yet really lightweight – so none of the sites I share it to get too stressed.
- It works well across many social media streams
The benefit of using an image like this is:
- It’s eye catching.
- It quickly explains what topic it’s covering across all mediums
- Visual people love it, and non-visual people are OK with it.
What do you think? Do you like it?
Here are my instructions for creating and image for MY blog articles:
- Go to https://www.canva.com/ and set up an account, it is free.
- On the top right, click where it says ‘Use custom dimensions’ and enter the following:width = 260
height = 150
mm = Enter mm first, as it overrides the numbers if you enter them first then select mm. - Click the green button labelled Design!
- On the left menu bar click BKGROUND and select one of the colour dots (I prefer a simple background, and I don’t want a patterned background).
I created an image of myself with the words Heather Smith slashed across it. The first time I used it I dragged the image across into CANVA. Once you’ve done this once you won’t need to do it again. - Position the image at the bottom right corner of the rectangle, very neatly. Use the arrow keys, if you just need to move it a tiny bit. I want the image (logo) always in the same position – and to look very neat.[If you get disorientated in Canva and need to find the image again – on the left menu bar click UPLOADS, and you should see it]
- On the left menu bar click TEXT options – I am happy to choose something different/interesting each time – but it MUST be readable. I sometimes play around and make the text bigger. I drag it upwards to the top, so the text is not over the image.
- My preference is to choose from the primary colours Canva has on display [black, green, blue, orange, red, yellow, white].
- Choose a text colour contrasts against the background – so the final image is easy to read.
- Once satisfied with the image, go to the top right menu bar and click the Download button, and at the drop down option, select As an image. Wait a few moments, and it will appear in your Downloads folder.
Hurrah! The image is now ready to use. All the images download to the download folder, but I suggest maintaining a folder in DROPBOX and transferring them there – so they can be shared with the virtual marketing team.
Let me know if you found this useful and if you need any further explanation of screen shots of how to do this.